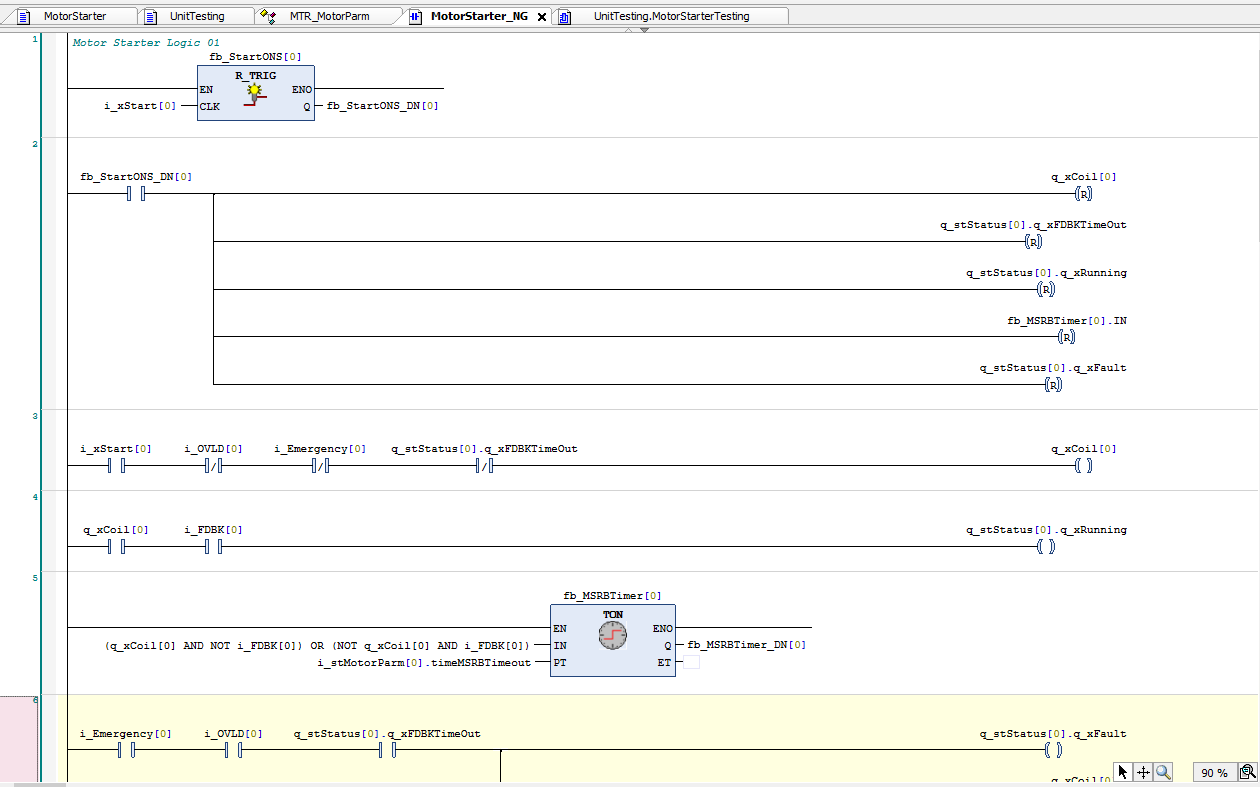

This works and it is sometimes, depending on your level of exposure to LAD, easy to follow. But it is error prone and very hard to expand upon. If you make one small change in your motor drive / starter logic now you have to go and change it everywhere in your LAD code. Which as you can imagine it is not efficient at all.
Encapsulating Logic with Function Blocks
A Function Block is essentially a reusable module that takes inputs, processes logic, and provides outputs. Here’s how we define our Motor Starter FB in Structured Text:
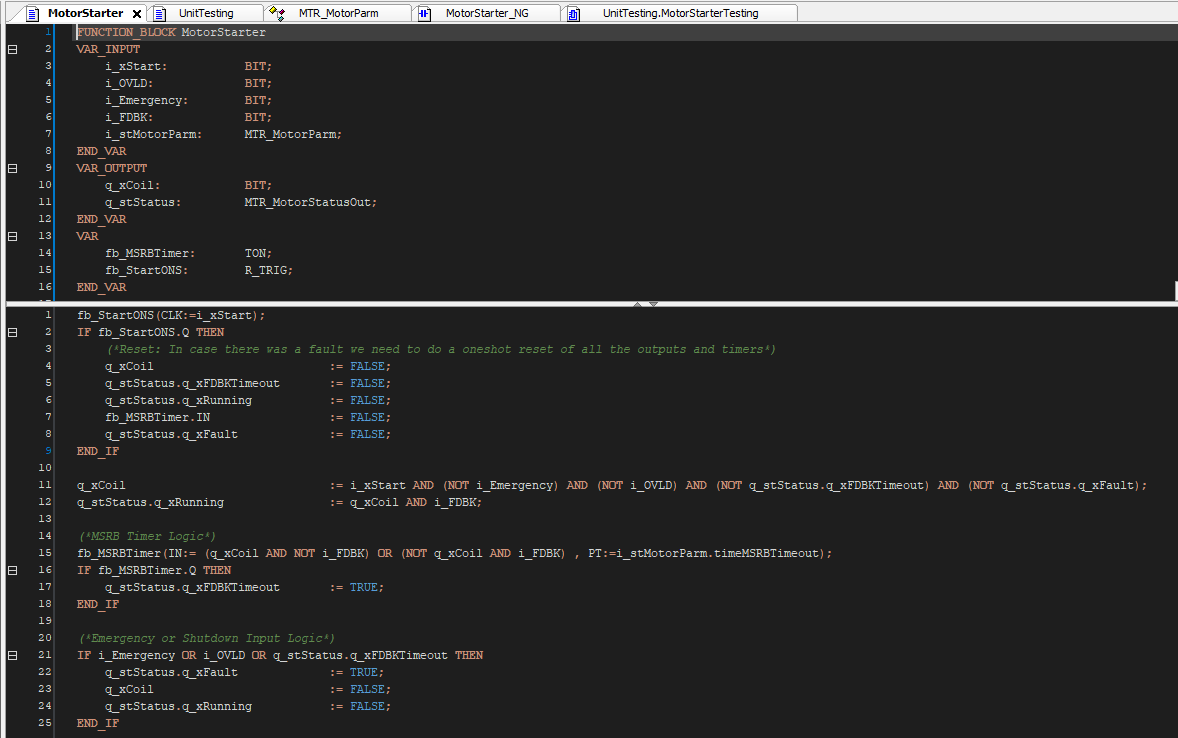

This block efficiently manages the motor starter logic, handling start conditions, overload protection, and feedback monitoring in a structured and reusable format.
Reusability and Scalability: The Game-Changer
With our MotorStarter function block in place, we can now instantiate multiple motor starters within a program, allowing for clean and scalable control implementations.
VAR
motorStarter: ARRAY[1..10] OF MotorStarter;
motorP : ARRAY[1..10] OF MTR_MotorStarter;
END_VAR
By simply declaring an array of Motor Starter objects, we can manage multiple motors without redundant logic. Each instance operates independently, making it easy to expand the system as needed.
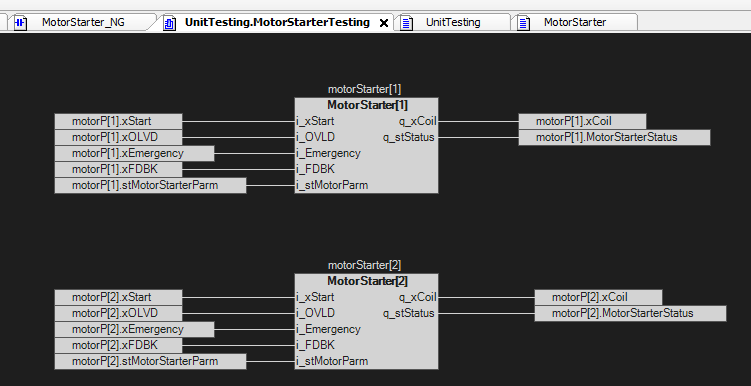

Unit Testing with Function Blocks
One of the best advantages of this approach is that unit testing becomes straightforward. Using Continuous Function Chart (CFC) or other visualization tools, we can instantiate multiple instances (e.g., motorStarter[1], motorStarter[2]) and clearly see how inputs affect outputs in real time.
This structured approach makes debugging significantly easier, as each instance retains its own state and can be tested independently before integrating into a larger automation system.
Conclusion:
A Step Toward Modular Automation
By utilizing Structured Text and Function Blocks, PLC programmers can write cleaner, more maintainable, and scalable code. Whether managing a single motor starter or an entire production line, this approach ensures consistency and efficiency.
This is just the beginning! Future discussions will explore how these principles integrate into larger automation systems, unlocking even greater possibilities. Stay tuned for more insights!

Variable Quick Declaration [CTRL + . ]
When you are building/writing your application sometimes you realize you need a variable you forgot to declare. In this case, just write the variable name, for example iMyVarInt, CODESYS's "intellisense" will draw a double red line under it. Now bring the cursor over the variable name you just wrote, and hit CTRL + . this will give you a small window with the option to Declare variable on the fly!
Variable Quick Refactoring [CTRL + . ]
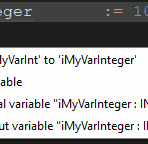
This works sometimes, and I have found it to not work well in some other instances. But when it does, it makes refactoring (renaming) variables a breeze. Lets say the iMyVarInt you created above is not the name you want for this variable. Instead of going to the variable declaration scope and right clicking and selecting to refactor, just change the name of the variable. CODESYS will recognize that, the variable is not declared under the new name, and draw a double red underline. Again hit CTRL + . you will get the window shown below. Now choose Rename 'iMyVarInt' to 'iMyVarInteger' hit OK on the window that appears and you are done!

Multi Cursor Selection [SHIFT + ALT + UP or Down Arrow Keys ]
This is super useful when programming in Structured Text. Lets take the example above, and now lets say your iMyVarInteger is an array with 10 elements. You copied over the variable a couple of lines and wish to add a [ ] to all of them. Simply hit SHIFT + ALT and use the up and down arrow key for multi-cursor selection and start typing away. Now this is great but next I will share with you my favorite way to modify lines of code at once using Notepad++


Multi Cursor Selection using Notepad++
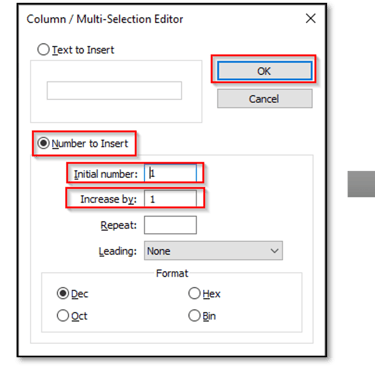
Ok so CODESYS IDE is great but it has it's limitations, this is where we have to get creative with our tool choices. For some tasks like this one I prefer Notepad++. Lets take the example above, now we have an array of INT for which the variable is called iMyVarInteger (probably should be Integer(s) but lets leave it like that for the example). Copy the iMyVarInteger := 10; line to Notepad++. Now use CTRL + D to duplicate the line 10 times. Use SHIFT + ALT + Arrow Keys for multi-cursor selection to add the [ ]. Finally place your multi cursor selection in between the brackets as shown below. Then hit ALT + C. You will be Presented with Column/Multi-Selection Editor, select Number to Insert, set your initial number, and your increase by and hit OK. You have just created 10 declarations for each element of your array. Copy and paste it back to CODESYS IDE, and modify or adjust as needed. This to me is one of the greatest benefits of using Structured Text in CODESYS. You can now use in conjunctions tools like, Notepad++, VSCode, and even run Copilot in VSCode after installing the Structured Text extension.
Once you get used to having a work flow with different tools like this, you can copy and paste edit code from one text editor to the other, boosting your productivity!

Quick Sanity Check - Generate Code [F11]
Once you get working with CODESYS for a while, and the size of your application grows. You start noticing that CODESYS is sometimes not very good at catching syntax errors automatically. So hitting the F11 key from time to time is a very good pro-tip. To me this is similar to hitting CTRL + S to save your application often in-case you experience a crash so you won't lose all your work!
Productivity Booster - Cycle Through Tabs [CTRL + Tab]
This is a huge productivity booster for me. Once your application grows and you have many tabs opened, sometimes you have to reference code that is on a different tab. Using your mouse to open the tab that you are looking for is good but you can quickly achieve the same results with CTRL + Tab. Reference the code you needed to reference and hit CTRL + Tab and you are back again on the pane that you were working on!
Where are My Comments? - FDB, LD, and IL Editors
This one tripped me up for a long time when I first started working with CODESYS—where did my comments go in my ladder logic code? It turns out there's a setting for that! To enable comments, go to Tools → Options → FBD, LD, and IL Editor, then check the box for Show network comment. Problem solved!
Input Assistant - [F2]
This one is a game-changer in Structured Text! Let's say you have a function block or function that takes multiple inputs and generates multiple outputs. When you start typing, for example, myFunction(, CODESYS will display a pop-up suggesting the required inputs and outputs. However, you’d still have to type each one manually, which can be tedious. Instead, press F2 to open the Input Assistant. Start typing the name of the function or function block you want to use—it should appear in the search results. Select it, ensure Insert with arguments is checked, then hit OK. CODESYS will automatically insert the function or function block with all its arguments, saving you time! Now, all that's left is to assign the correct variables to each parameter.


